SlothHosting will be temporarily closing soon. Check our dashboard for more information.
SlothHosting will be temporarily closing soon. Check our dashboard for more information.
Back to Knowledge Base
A step-by-step guide to setting up your SlothHosting account and getting started with your Minecraft Server.
Author: SlothHosting
Read Time: 5m
Date Published: 30/07/2025
Getting Started
#hosting
#setup
#beginner
#minecraft
Welcome to SlothHosting! This guide walks you through every step to set up your Minecraft server—from creating your account to managing your server in the panel.
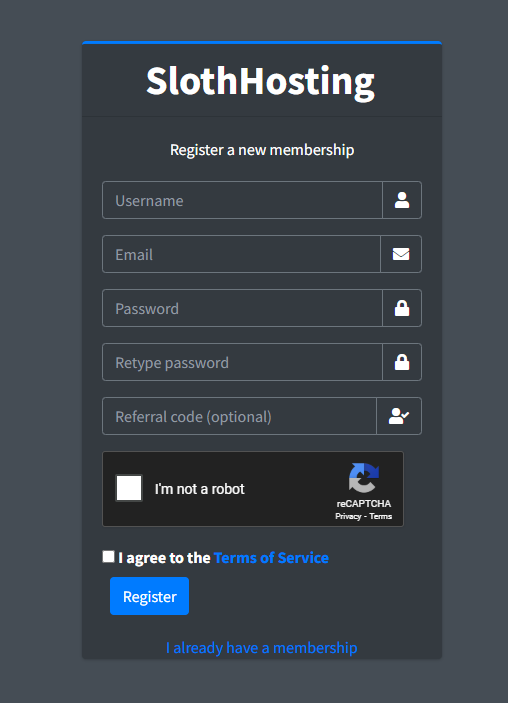
Head over to our Sign-Up Page and fill in the required details (username, email, and password).
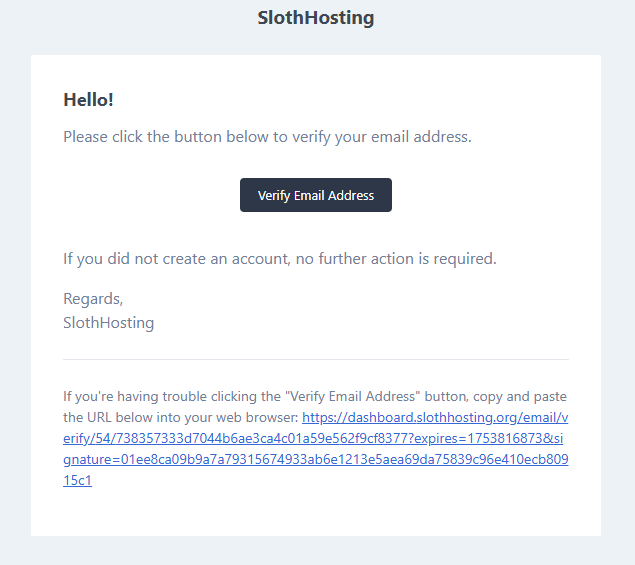
After registering, check your email inbox (and spam folder) for a verification email. Click the link to activate your account.
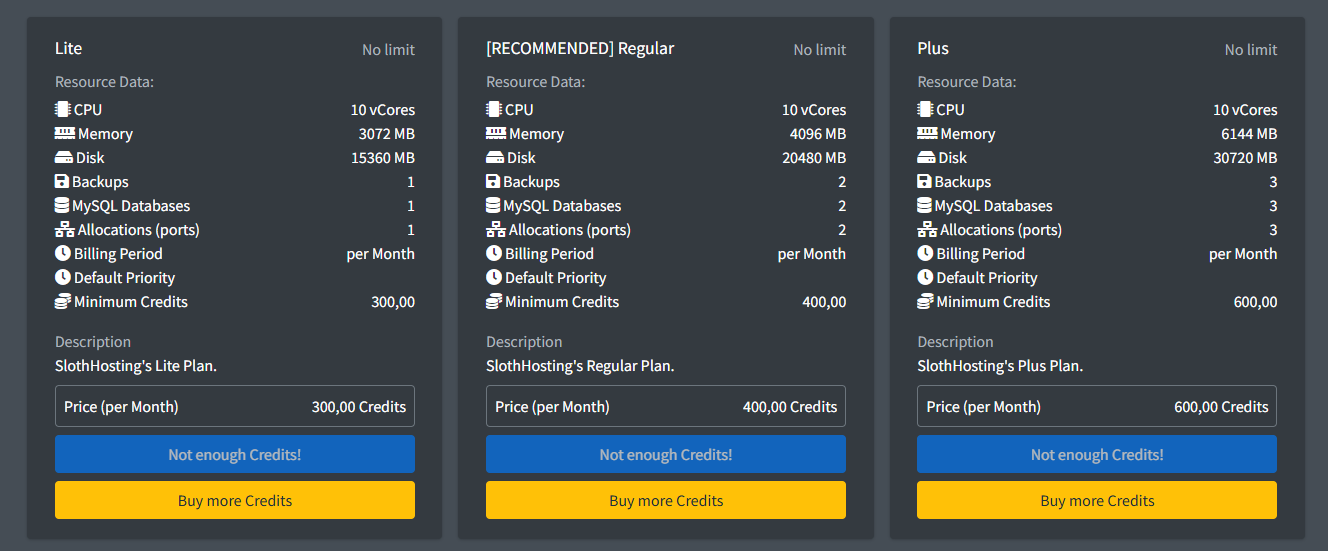
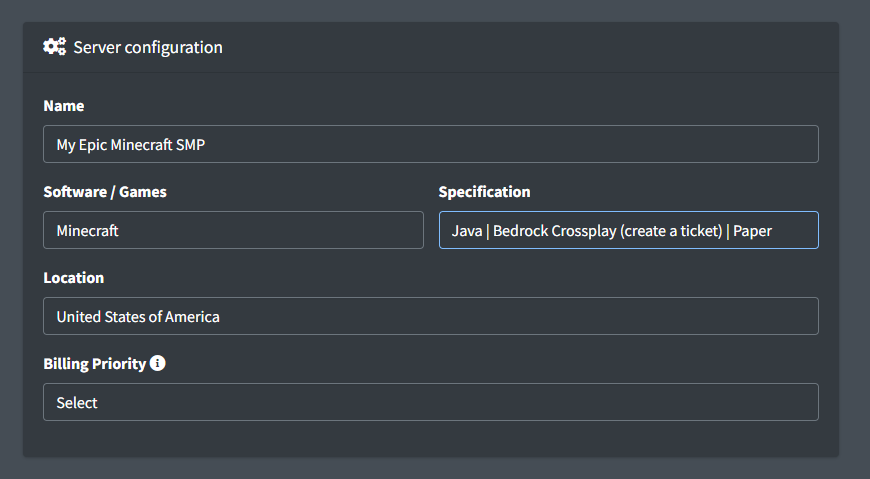
Once your account is active, navigate to the Create Server page. Here you can view different plans optimized for performance and budget.
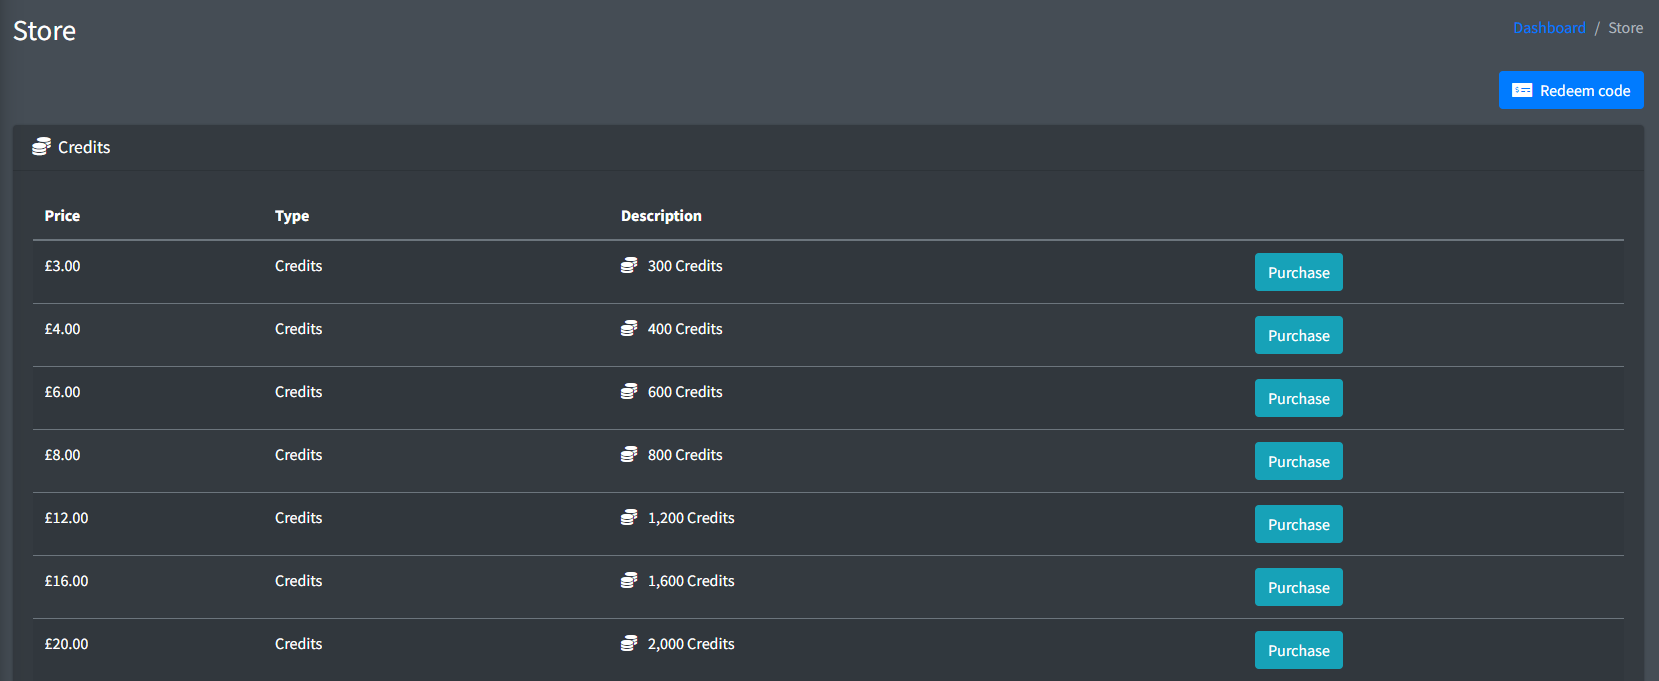
Before creating a server, you need credits. Go to our Store page and select a credit package that fits your needs.
Now return to the Create Server page. Select:
Once your server is created, head to our Server Control Panel.
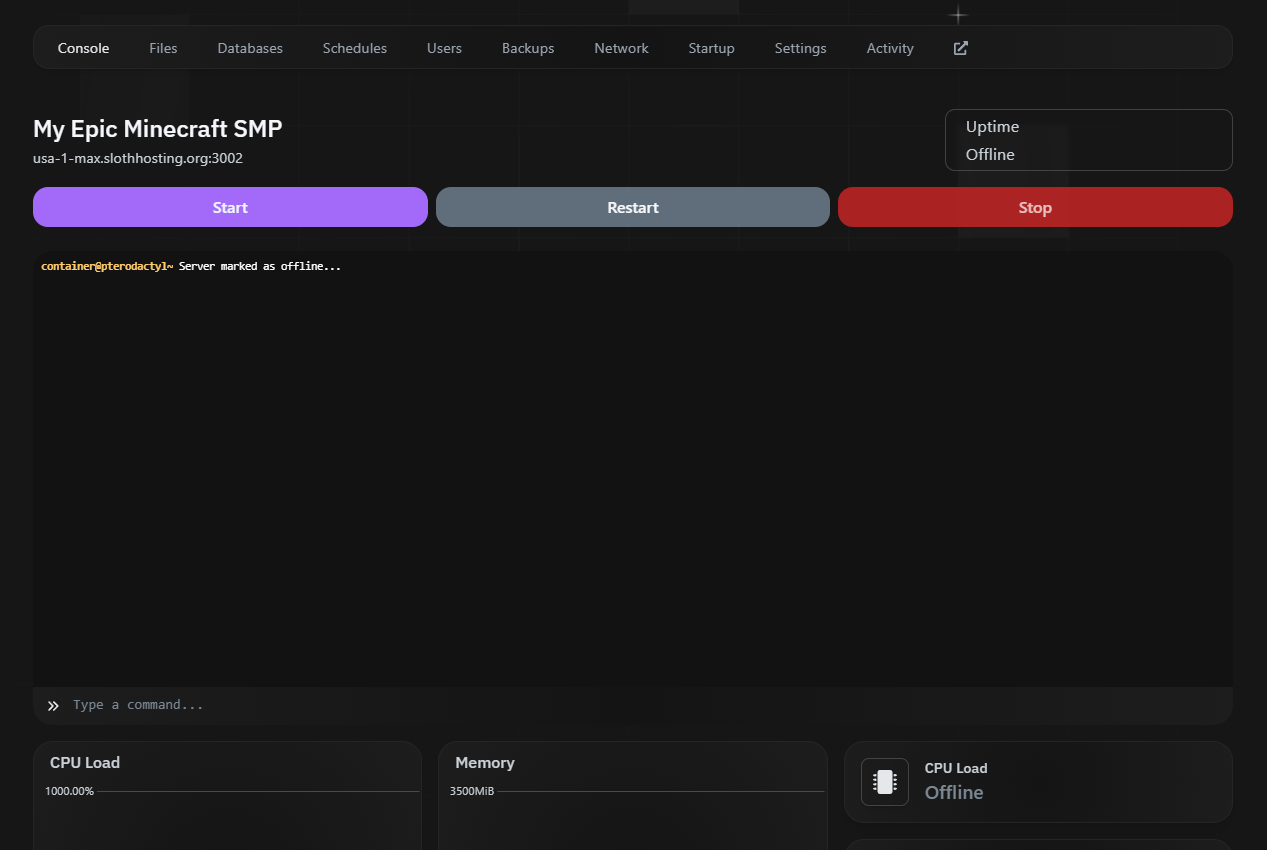
From the panel, you can:
# In the console tab
start